Quick setup of a zyxel router: how to create a Wi-Fi network. How to Set up a Zyxel Keenetic Lite Router - Connecting to the Internet and Distributing WiFi at Home How to set up routing on a zyxel router
Zyxel Keenetic Start is a light model of Zyxel Keenetic. However, Keenetic Start will perfectly solve the problem of connecting electronic devices to the Internet. The router will allow you to connect home computers and all kinds of gadgets into a network and provide simultaneous access to the Internet from several devices via Wi-Fi.
For guest devices, it is possible to allocate a separate Wi-Fi network with Internet access, but with limited access to personal data. A standard firewall is responsible for the information security of your home network.
Router configuration and appearance
The router's equipment is minimal: a small network cable, documentation and a power supply. All inscriptions on the device body are made in Russian. The device is available for wall mounting. In a convenient place is the WPS activation key - a function that allows you to simply and immediately connect Wi-Fi devices to the router, without using an encryption key.

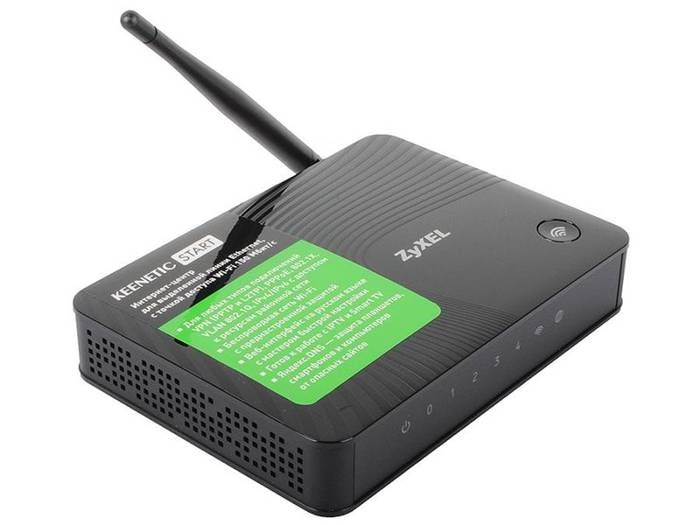
In appearance, the router in question is very similar to its older brother (Keenetic 4GII). It only differs in the absence of USB ports and the presence of only one 2dBi antenna.

The device is quite compact (140x110x30 mm). Its weight is only 180 grams.
On the top side there is a trademark of the manufacturer, a WPS button to enable an automatic secure Wi-Fi connection, and LED indicators for power, the inclusion of a wireless Wi-Fi module, the presence of an Internet connection and connection to lan ports.
All ports and connectors are located on the back of the router.

Connection and preparation for work
Connecting the Zyxel Keenetic Start router may seem complicated at first glance.
Let's consider the connection process in detail:

After connecting the router, it is important to configure the Zyxel Keenetic Start router. To configure it, you first need to log in to the router interface.
Login to settings
There is no need for specialized programs to configure and maintain the router. All control of the router is carried out using a web browser.
To enter the router interface, you must do the following:

In Zyxel routers, there is a “Quick Setup” for initial Internet setup.

Internet connections
The router supports several options for connecting to the Internet, which are determined primarily by the choice of communication service provider.
PPPoE for Dom.ru, TTK and Rostelecom
The sequence of actions for setting up a router from Zyxel for these providers (Rostelecom, TTK and Dom.ru) is as follows:

An Internet connection will be created.
Dynamic IP
To set up an Internet connection with a dynamic address, you must:

The Internet connection with a dynamic IP address is ready.
Video: Review of Zyxel Keenetic Start
How to set up a Zyxel Keenetic Start router for Beeline
The sequence of actions for setting up the router in question for Beeline is as follows:

As a result of the actions taken, a new connection for Beeline will be created.
Local LAN
To configure local network options on the wi-fi router in question, you need to:

WiFi
The sequence of steps for setting up a Wi-Fi connection on the Zyxel Keenetic Start device is as follows:

IPTV
IPTV is a special technology that uses a specialized IP protocol when transferring information over networks. Thanks to this, television broadcasting of channels is realized using multicast transmission. For IPTV to function, you just need to install the latest version of the device’s firmware, and the application will automatically make the correct settings.

In the router in question, the “Applications” tab is responsible for setting up IPTV, in which you should enter the required parameters and save.
Resetting the router
In order to reset the router, you must perform the following steps:

After this, the router's power indicator will start blinking and then the router's settings will be reset to factory settings (default settings).
Updating the firmware
Quite often there are cases when it is vital to update the firmware of a device. Despite the fact that this is a very responsible action, if you follow certain instructions, it is not at all difficult to install a new version of the software yourself.
It is recommended to update the software in question by connecting to the router using an Ethernet cable. To update the firmware, you need to use the standard component update function. It is important that you have a stable Internet connection when performing the update.
To update the firmware on a Zyxel router you need to:
It’s not for nothing that Zyxel positions Keenetic Start as an entry-level Internet center. Its setup is very trivial, and its capabilities allow you to create a compact computer network without much difficulty. This is an ideal choice for home and compact office.
>Zyxel offers its customers a range of Internet access solutions, including devices for providers and large offices, as well as regular access points used to build a home wireless network. We will not consider all possible options for accessing the Internet and will focus on a topic that is relevant for ordinary users: how to configure a Zyxel Keenetic router to gain access to the network?
Connecting equipment
The first thing you need to do is connect the router to your computer. Any user can cope with this task:
It is better to choose the LAN port on the router as number one. The rest may be needed in the future to connect a set-top box or other equipment that needs Internet access.
If you did everything correctly, several indicator lights should light up on the router, signaling the presence of power and connection to the computer’s network card.
Checking the network card
The next step after connecting the device is checking the network card parameters:

Router operating parameters
After the hardware connection and checking the network card, you can begin configuring the router settings. First, it is recommended to change the access password to the network device interface so that a limited circle of people can manage its settings:

The next setup step will be checking and updating the firmware.

Wait until the file is downloaded without turning off the computer or restarting the router. After its completion, you must reboot the equipment to apply the new configuration. 
These are the main functions available through the router's web interface. Here you can add the ability to create a local network through a router, see the number of connected devices, and also configure the communication mode with a computer.
Connection setup
When starting to create a new Internet connection, check with your ISP to see what protocol it uses. The order and complexity of creating a connection depends on this.
As an example, we will select two protocols – PPPoE and L2TP. The connection is created in the “Connection” section, which can be found by opening the “Internet” tab. To perform this operation, you will need an agreement with the provider, which contains all the necessary information.


After saving the changes, you should have a new connection through which you can access the Internet.
Creating a Wireless Network
Setting up a Wi-Fi connection in the Zyxel Keenetic router follows the standard procedure:

The wireless network is configured - now you can connect to it from a laptop, tablet or any other device equipped with a Wi-Fi module.
Additional functions
Zyxel Keenetic routers have wide functionality that allows them to be used to perform various tasks. For example, if you want to connect a VPN, you can do this in the “Authorization” section on the “Internet” tab.

After applying the changes and saving the new configuration, you need to check the correctness of the created connection. Click the "Connect" button and make sure that the connection status has changed to "Connected".
Interactive television
Zyxel Keenetic routers provide users with two options for playing interactive television, provided they connect to this service from their provider:
- Through the STB set-top box on the TV.
- Using special software on a computer.
Depending on the chosen method, the procedure for setting up IPTV is slightly different, but its essence remains the same. You will set the parameters on the “Home Network” tab in the “IP Television” section.
If you want to watch interactive television on your computer using programs such as IPTV Player or VLC, then set the “TVport Mode” parameter to “Automatic”. After saving the change, you can customize the channel list in the player. 
A little more steps are required when using an STB set-top box. Firstly, it needs to be connected to one of the LAN ports of the router. Secondly, for the “TVport Mode” parameter, you must select the “Assign LAN connector” value.
In the line “Connector for receiver” you will be able to select the port to which the set-top box is connected. Enter the required value and apply the new configuration.
Zyxel Keenetic network devices also have other useful functions that allow, in particular, setting up port forwarding necessary for working with file sharing services, or adjusting routing parameters for interacting with local networks.
However, these features are specific and are rarely needed by ordinary users. If you are interested in details, you can always clarify them in the comments.
How to connect a zyxel router?


Today, router models from Zyxel are becoming increasingly popular. This company has a good reputation in the Russian market. Its devices, including routers, are in great demand. In this regard, in this article we will look at how to connect and configure such a device.
We will consider this process using the example of the Zyxel Keenetic Giga router model.
Connecting the router to the network
Before you begin the basic setup, you need to connect the router to your computer and network.
Please note that the model of this router has special inputs called “LAN”. You will need to insert network cables into these inputs. This model comes with two network cables. You must connect one of them to the yellow port (one of four), the other to the blue port, and you also need to connect the antennas. Don't forget about the phone, which also connects to a special black socket.
Finally, you need to turn on the router and connect it to your computer using a USB cable. After this, you can begin basic setup.
Basic router setup
There are two main ways to configure this router model. The first method is using the built-in “Zyxel NetFriend” program, which comes with the device. Another way is using the web interface. The second option is simpler, and we will consider it.
Configuration using the web interface
First of all, you need to configure the firmware and protocol.
Firmware setup
- Enter the IP address 192.168.1.1 in the search bar of your browser.
- After you enter the IP address, a window will appear asking for your login and password. Enter your username and password: usually “admin” and “1234”. Your device may have a different login and password. You can recognize it by looking at its body on the reverse side.
- After you enter your username and password, the system will automatically take you to the system monitor of the Internet center, where you can see the settings of your router.
- Next, you need to update the firmware. To do this, pay attention to the menu on the left. Select the "System" tab and go to the "Firmware" item.
- In the window that opens, click the “Browse” button and indicate where the old version of your device’s firmware is located.
- Having specified the folder with the file, click “OK” and then “Update”. Updating the firmware is necessary for the device to work correctly. You can download the latest firmware on the website zyxel.ru.
- Go to the “System” tab and go to the “Operation Mode” item. Here you can configure the operating mode of your router. This can be the standard default mode, via a wireless wi-fi network, or using 3G and 4G modems, if you have one.
Protocol settings
All provider data is usually specified in the service agreement.
- If your provider uses authentication, then you must use the data received from it, which you will need to enter by going to the “Internet” tab, and in the “Authorization” item, select the desired protocol (for example, PPPoE). The protocol used by the provider is specified in the service agreement of your provider company.
- In the “Connect via” line, select the interface to connect to the network.
- Depending on the data received from the provider, in the “Configuring IP parameters” line, select “manual”, “automatic” or “without IP address”.
Setting up wi-fi
- Go to the “Wi-Fi Network” tab, here you can set up a wireless network by assigning a name to it and hide the SSID, which will allow you to cancel guest access and make using the network more secure.
- Go to the “Wi-Fi Network” tab and select “WPS”.
- Place in the line “WPA Authentication - PSK”. Assign a network key and click Apply. Thus, you have set a password for using the wi-fi network.
- Setting up 3g and 4g is carried out similarly in the corresponding tab.
Problems with the router
If your router encounters problems during operation, you can use the following tips.
- The main malfunctions arise due to incorrect operation of the provider and a disrupted signal. The problem can be solved by simply reconnecting to the network. Just press the power button, wait a few seconds and turn on the device.
- If you notice that you are experiencing traffic, check whether your network is hidden. If yes, then see if the password is shown. It's entirely possible that someone could have used it. There are also frequent cases of network hacking. To protect yourself from intruders, install an antivirus.
In this section you can find a lot of useful information on this topic.
To properly configure the router, you need to find out the network connection parameters and, first of all, the Internet access protocol. To do this, open the “Network Connections” window. If, in addition to the standard shortcuts, you see an additional connection icon, then your provider uses the L2TP, PPTP or PPPoE protocol. Which one will be indicated under the connection label.If the connection to the Internet is made using the L2TP, PPTP or PPPoE protocol, you will need a login and password assigned by your provider. When connecting via PPTP and L2TP, you must also specify the operator's server or destination IP address. To define them, open the “Properties” of your connection. The data should be rewritten and the shortcut deleted.
Now open the context menu of the Local Area Connection shortcut and select Properties. Click on the line “Internet Protocol Version 4 (TCP/IPv4)” and click on the “Properties” button. In case of a dynamic IP address, the fields will be empty. If the IP is static, then save all the specified parameters. Check the boxes “Obtain an IP address automatically” and “Obtain a DNS server address automatically” and confirm your choice by clicking “OK”.
It remains to find out whether your provider filters by MAC addresses. Open the Local Area Connection shortcut menu again. Select "Status". In the window that opens, go to the “Support” tab and open “Details”. Find the line “Physical Address” and write down the information indicated there.
Turning on and setting up the router
Plug the power adapter into a power outlet. Wait until the power light stops blinking and connect the router to your computer. To do this, connect one of the router’s connectors to the network adapter using an Ethernet cable or set up a Wi-Fi connection. The Wi‑Fi network name and security key are indicated on the router label.Launch your web browser and go to 192.168.1.1. The Internet center web configurator will open. In new models of Zyxel routers, the functions of the NetFriend utility have been transferred to the firmware. Click the "Quick Setup" button. A wizard will launch that will help you configure the connection.
A “Network cable is not connected” warning will appear on the screen. Plug your provider's Ethernet cable into the WAN connector and click Next. In the window that opens, you need to answer the program’s question whether your provider registers MAC addresses, and if necessary, specify the registered address.
If using a static IP address, select Manual and enter the IP address, gateway IP address, subnet mask, and DNS server in the appropriate fields. These parameters are assigned by the provider. If your service provider has not assigned you an IP address, select Automatic and click Next. If you need to specify DNS parameters, check the box “Set DNS server addresses manually” and enter the IP address in the “DNS Server” field.
Next, you will be asked to enter your username and password to connect to the Internet. If they are in the contract, fill in the appropriate fields. To connect to a VPN (L2TP or PPTP), you will need to specify the IP address or name of the VPN server. When connecting to PPPoE, you may need the PPPoe service name and PPPoE concentrator name (provided by your ISP).
If all data is entered correctly, a connection to the Internet will be established. The wizard will check for updates. If available, click the “Update” button. After downloading and installing the updates, the device will reboot. The message “The Internet center is configured and has established a connection to the Internet” will appear on the screen. This completes the master's work. More experienced users can go to the web interface and configure additional features.
Having signed a contract with a provider and purchased the appropriate equipment for organizing a wireless home network in order to access the Internet, the user is faced with the need to adjust electronic devices.
Of course, you can use the services of specialists, but, as popular wisdom says, if you want it done well, then do it yourself. The following guide will help you implement this statement, the main thing is to show a little care and take some personal time.
But if there is a subsequent need to carry out such operations, thanks to experience, the time required to enter parameters into the device’s web configurator will be required significantly less. At the same time, you can save it on waiting for the arrival of the master.
Preliminary activities
Careful preparation at the beginning allows you to successfully achieve your final goal. By consistently performing all stages of the procedure, from connecting the device to adjusting it, even a complete “teapot” is guaranteed not to create significant difficulties in setting up the ZyXEL Keenetic II Internet center.
Connection
At the first stage, you should remove the device from the box with all the elements offered for it. Then proceed to the connection procedure, and to do this follow these steps:

Preparatory work with the computer
Now you need to make sure that the network card settings are correct. This procedure is also simple when you have a step-by-step algorithm of actions before your eyes.
The following few steps are required:

 Now you should proceed to entering parameters into the router’s web configurator in order to establish a connection with the World Wide Web.
Login to the web configurator
The modem setup process is carried out in a browser window, so you can enter all the necessary parameters using a PC or mobile device on any platform.
To enter the web interface, you must complete these steps:
- Click “Enter”;
- Next, click “Web Configurator”;
- If the firmware advises you to change the authorization parameters at this stage, then it is better to agree and enter your own original name and code (it is recommended that if you have a printer, then immediately print them out or manually write them down in a personal notebook, since even an old piece of paper remembers information better than the most good human memory);
- After completing all the steps, the main menu of the device will appear on the display, providing access to its settings.
What to do when you fail to log in?
If the entered code did not allow you to enter the web interface, it means that it was already changed earlier by a previous user or in the store, by some curious buyer who managed to tinker with the equipment settings.
The problem can be solved using a standard rollback technique; as a result, the factory password and login will be in effect again.
To reset parameters to factory state, follow these steps:

Procedure for entering network parameters
After completing the above steps, the main office is displayed on the monitor, in which all manipulations with the network settings are carried out.
However, before you start entering parameters, you need to write down the access protocol used, for example, PPPoE, L2TP, etc., from the signed contract with the communication provider. You also need to clarify whether the MAC addresses are fixed by the supplier. What IPs are used, for example, dynamic IP or permanent path.
Is it also necessary to register the IP and name of the VPN server? That is, find out all the parameters that need to be entered into the interface. If the user does not have the contract in hand, then when the client calls, the provider provides all information by phone, the technical support number of which is indicated on the company’s official resource.
In the web interface you need to do the following:

Wi-Fi setup
Solving the question of how to set up a secure wireless Wi-Fi access point will not take much time.
The developers have made life as easy as possible for owners of second-generation ZyXEL Keenetic devices and have ensured that immediately after the first launch the device creates the most reliable Wi-Fi network using the WPA2 standard.
In this case, a channel is automatically selected that is optimally suited to the current environment.
Therefore, usually there is no need to change anything in the web configurator. To enter the broadcast network, you only need to know the name and code, and as mentioned above, they are written in the documents in the user’s hands.
Those who wish to change the set parameters can easily do this by logging into the device interface.
The sequence of steps, using the Keenetic Lite model interface as an example, is as follows:

Setting up to watch digital television
For Keenetic 2 Internet centers, the developers have implemented convenient IPTV adjustment, but only in the latest firmware modifications.
 The firmware has a built-in “TVport” function so that you can specify a separate port dedicated to the set-top box. If the equipment software has not been updated for a long time, then it should be updated before starting the setup procedure.
To find out the current software modification, you need to open the “System Monitor” tab. After that, go to the “System” section. Next, in the “System Information” section, look at the firmware version.

Then you can upgrade the firmware through the web configurator. The default settings allow you to immediately watch interactive television in these routers. Therefore, the user is not even required to delve into the web configurator.
Operation of the Keenetic access point via an ADSL modem
When using an ADSL modem to access the global network, which does not have a Wi-Fi broadcast function, the second generation Keenetic device will help create a Wi-Fi line.
The ADSL modem is connected to the Internet provider, and the device from ZyXEL just needs to be connected to the modem by wire and set to wireless access point mode in the web configurator.
Thus, Keenetic will transmit the bridge. The figure below shows a diagram of the operation of the equipment. In this mode, the device operates as a repeater.
 To set up the repeater, you need to complete the following steps:

Port forwarding
If you want to access the interface of your home equipment through the World Wide Web, you can forward ports in the ZyXEL Keenetic 2 web configurator or, as professionals call it “Network Address Translation (NAT).”
Steps to follow: